.breadcrumbs { padding:5px 5px 5px 0; margin:0;font-size:95%; line-height:1.4em; border-bottom:4px double #e2e7b4; } .breadcrumbs a { text-decoration:none; color: #000000; }

G.f.a Productiom

DCM Galeri Headline Animator

Showing posts with label Compressor. Show all posts

Tuesday, October 30, 2012

Understanding Compressor (Part 2)-how to Setting Compressor

Learn how to properly setting compressor is certainly not an easy thing because of the resulting effects of compressor is not very audible such as equalizer, reverb, delay, and pemanipulasi other sound tools. One approach to setting compressor which is quite powerful to understand how the compressor works and how the resulting output is setting compressor maintainable so we clearly hear what we

Set release as soon as possible, the ratio is as high as possible, and to signal the thresold feels very compressed. After we get the three knob on very extreme positions, it is time set knob to the desired position for attack. With the extreme setting will make it easier for us to know the sound changes that happened when we set up the attack.

Next sweep attack from very fast to very slow while hearing the voice changes carefully. Fast Attack transients would cut so that the sound sounded blunt and slow attack will pass a transient. How are you going to attack will be very setting depending on the situation and the sound you want to get.

The important point is to forget the presets list. With much of the hearing you will increasingly get a "feel" to get the sound you want quickly. But presets can also be the starting point that gives us input as to how we are setting the compressor on a particular situation, just don't get too dependent on presets list so forget the essence of the album itself.

Another important point is the extreme settings on the three knob, the sound that is heard will be very severe, you should ignore it. Extreme settings you intended to focus on the effects of the change of attack time.

After the attack time is set at the position you want, it's time to step into setting release. Same as setting attack, listen to sound changes that happened with care, forget the math (as on how "should" release time according to the BPM with a certain formula or whatever) and feel the feel/groove. After getting the attack and release, it is now time lowering the ratio to the position you want. One approach that can be done is the lower ratio until you no longer hear the effect of the attack and release then praise again slightly until the resulting sound is heard. The key remains the same, listen carefully. After getting attack, release and ratio, prepare yourselves on the last step i.e. thresold. If you follow this tutorial from the beginning, the possibility of compressormu are working all the time with hard because the gain reduction is high so you can hear clearly the sound changes that occurred since the first three knob settings but maybe this isn't what you want

Praise thresold slowly or scaled thresold slowly so that the resulting sound sound fitting, no over compressed but not too less compressed (depends on your wants and tastes).

I hope this little process can help "unlock" your ear so that you can hear the sound changes that occurred on each knob in the compressor with clear so that you have a hand in deciding how you should be setting the compressor to get the sound you want. Mixing it about how to listen carefully and I think this process can help make it easier to hear carefully the effects that result from the compression process.

Focusrite | Rode Microphone | Mixing Tutorial | Recording Studio | Home Recording


View the original article here

Monday, October 29, 2012

Understanding Compressor (part 1)-Understand the controls and features in Compressor

In terms of audio, the compressor is a tool commonly used to decrease the dynamic range (dynamic range) of an audio signal. For example, in a composition of music that we're mixing, vocals that we have very berdinamika, sometimes the pronunciation of lyrics too softly and sometimes pronunciation of lyrics too toned. To minimize the dynamics so that the vocal levels more stable, we can use the compressor. In addition to using the compressor, some prefer using sound engineer fader manually, this technique is commonly referred to as the level of automation. However, some choose to use compressor sound engineer because of its versatility to decrease the dynamic range without having to change the fader manually from each part into another part in a song. Some other sound engineer even use compressor and faders simultaneously to gain maximum control over.

Some of the basic elements on the compressor are:

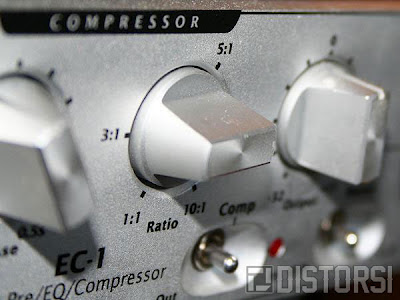
Ratio a comparison between dB signal expressed in compressor and signals that come out compressor. A 4: 1 Ratio means that any incoming signal compressor by 4 dB will be reduced so that the signal that goes out compressor stays of 1 dB. On the compressor Ratio can vary from 1: 1 to infinity: 1. The higher the ratio the more signal means the compressor is reduced and the smaller dynamic range so that the audio signal is becoming increasingly stable. Thresold declare dB where the compressor begins to process the incoming audio signal. For example we are setting the 0dB Thresold, then the compressor just started to process the audio signal when an audio signal hits the 0dB. If the audio signal has not touched the 0dB then compressor not working. The lower the thresold then the faster the compressor starts to work. The Gain Reduction or also called attenuation stated number of dB signal which has been compressed, the higher the gain reduction, then the more the signal is compressed. The Gain reduction is too much will led to the signal to be compressed and voice-over sound like a squashed. Attack States needed time compressor (usually in units of ms) for processing an audio signal. If we attack setting time of 0 ms then no attack at all because of the incoming signal is directly processed by the compressor and causing sound will sound very dull. If sound is heard through the compressor, blunt might attack his time too fast, try to slow down the attack time Release stating the time in units of ms needed compressor (usually in units of ms) to compress before removing the effects of compressor to compress it back then. The Release time is too fast will cause the effects of pumping (pumping), the release time is too slow will cause compressor not working to the maximum because of the signal will be compressed before it is discharged again. The combination of attack and release time is essential to generate the character dynamics as desired. The Gain also known as output, used to compensate the gain is reduced by the process of compression. For example we compress the vocal with the gain reduction of 4 dB. Then the resulting audio signal will sound 4 dB weaker than the audio signal before it is compressed. To restore the gainnya as it was before, then we increase the gain or the output of 4 dB. How Setting Compressor?After learning about the functioning of a general overview of each knob on the compressor, the next step is to try to put into practice the theories have gained into real applications. But with the number of knob is there, sometimes making us confused as to where we need to start setting the compressor and how.

Look forward to Understanding Compressor part 2 where I will try peeling one technique which hopefully can help speed up your learning curve in understanding the compressor

Mixing Tutorial | Distortion | Recording Studio | Home Recording | Sell Midi Controller | Sell Recording Tool


View the original article here

Choose Masterbuss Compressor For Your Music

Figure 1. Different types of masterbuss compMasterbuss compressor is one of the unique and interesting phenomenon in the world of audio mixing. Why do I call interesting? Because it is so often done by the mixing engineer but however less favoured by the mastering engineer, especially when setting the compressor in the infinite set of a'la limiter and leaves very little headroom for mastering engineer. Mastering engineer you will be mencak-mencak: p.

The results mix that goes through masterbuss the comp will be more pronounced his excitement, more felt his groove, and more punch. Of course this also depends on the type of election material, compressor, usage instructions and setting the compressor itself.

The results mix that goes through masterbuss the comp will be more pronounced his excitement, more felt his groove, and more punch. Of course this also depends on the type of election material, compressor, usage instructions and setting the compressor itself.

Masterbuss how to use compressor there are 3 common
Mixing through Masterbuss compressor. Masterbuss compressor activated since the beginning and we are mixing thru masterbuss comp itself. Advantages of this technique is a more sound character and attitude that is more fitting. It should be noted here that the election of compressor prevalent and varies according to the genre of the music itself is very important. You certainly don't want to mix your metal sounding deflated in the frequency lo mid!Masterbuss compressor at the end. The result is usually more transparent and more focused on the dynamic control of the mix. To note is when we put up the masterbuss comp, then the whole track will pass the compressor and may change the balance adaTanpa masterbuss compressor at all.
Figure 2. Manley Megas Yialos. Compressor required for genre popPemilihan types and masterbuss compressor settings also vary for each genre. Often this type of compressor is selected is a type of VCA or optic. Not always like this but I usually start here for further tweaking more in track suits
For this type of music is Funk, usually to the bass and drums are highlighted. It needs to be setting a slow attack, fast release and a moderate ratio for mengekspose groove of music. Can be started from Attack 30ms, release 0.1 – depending on the tempo with a 1ms ratio 2: 1. Keep the Gain reduction is about 2-3 dbUntuk type of Rock music, usually want highlighted is the glue and wide. Then choose a compressor which is not narrowed its airy your stereo. A 30-10ms R 0.1-1ms or auto release. Sidechain feature itself is very useful for removing the sub frequencies in order to kick roaring did not interfere with the balance of the whole track. Keep the gain reduction of no more than 3 dbUntuk of Music Dance, usually to achieve maximum gain and punch. Select a compressor with a transparent character and punch. A 30ms R 0.1 ms with gain reduction to 5 db. Parallel compression feature would be very useful in keeping the compression can be maximized with less artifactUntuk usually pop to be achieved is the glue and enhance. Select is usually the type of compressor tube with smooth character. A 30-10ms R 1-2 ms or auto release. The Gain Reduction 1-2db

Masterbuss compressor usage alone should not be relied upon to get the balance, character, and glue. Balance and the glue should begin from the compression of each channel is made, masterbuss the comp just as a topping for Dynamics and character of the song "out" perfectly.

By: Dya Pratama Andryan

Mackie Mixer | Mixing Tutorial | Recording Studio | Home Recording


View the original article here

Friday, April 27, 2012

Understanding Compressor (part 1) - Memahami kontrol dan fitur di Compressor

Dalam istilah audio, compressor adalah tool yang biasa digunakan untuk memperkecil dynamic range (jangkauan dinamika) dari sebuah sinyal audio. Misalnya dalam sebuah komposisi musik yang sedang kita mixing, vokal yang kita miliki sangat berdinamika, kadang pengucapan lirik terlalu pelan dan kadang pengucapan lirik terlalu kencang. Untuk memperkecil dinamika sehingga level vokal lebih stabil, kita dapat menggunakan compressor. Selain menggunakan compressor, beberapa sound engineer lebih memilih menggunakan fader secara manual, teknik ini biasa disebut level automation. Namun beberapa sound engineer memilih menggunakan compressor karena kepraktisannya untuk memperkecil dynamic range tanpa harus mengubah fader secara manual dari tiap part ke part yang lain dalam sebuah lagu. Beberapa sound engineer yang lain bahkan menggunakan compressor dan fader secara bersamaan untuk mendapatkan kontrol yang lebih maksimum.


Beberapa elemen dasar pada compressor antara lain:

Ratio
Ratio menyatakan perbandingan dB antara sinyal yang masuk compressor dan sinyal yang keluar compressor. Ratio 4:1 berarti setiap sinyal yang masuk compressor sebesar 4 dB akan direduksi sehingga sinyal yang keluar compressor tinggal sebesar 1 dB. Ratio pada compressor dapat bervariasi dari 1:1 hingga tak hingga:1. Semakin tinggi ratio berarti semakin banyak sinyal masuk compressor yang tereduksi dan dynamic range semakin kecil sehingga sinyal audio menjadi semakin stabil.

Thresold
Thresold menyatakan dB dimana compressor mulai memproses sinyal audio yang masuk. Misalnya kita menyetting Thresold pada 0dB, maka compressor baru mulai memproses sinyal audio ketika sinyal audio menyentuh 0dB. Jika sinyal audio belum menyentuh 0dB maka compressor belum bekerja. Semakin rendah thresold maka semakin cepat compressor mulai bekerja.

Gain Reduction
Gain Reduction atau disebut juga attenuation menyatakan banyaknya dB sinyal yang telah terkompres, semakin tinggi gain reduction maka semakin banyak sinyal yang terkompres. Gain reduction yang terlalu banyak akan meyebabkan sinyal menjadi over compressed dan terdengar seperti tergencet.

Attack
Attack menyatakan waktu yang dibutuhkan compressor (biasanya dalam satuan ms) untuk memproses sebuah sinyal audio. Jika kita menyetting attack time sebesar 0 ms maka tidak ada attack sama sekali karena sinyal yang masuk langsung diproses oleh compressor dan menyebabkan sound akan terdengar sangat tumpul. Jika sound terdengar tumpul setelah melalui compressor, mungkin attack time nya terlalu cepat, cobalah untuk memperlambat attack time

Release
Release menyatakan waktu dalam satuan ms yang dibutuhkan compressor (biasanya dalam satuan ms) untuk mengkompres sebelum melepaskan efek compressor untuk kemudian mengkompres kembali. Release time yang terlalu cepat akan menimbulkan efek pumping (pompa), release time yang terlalu lambat akan menyebabkan compressor tidak bekerja dengan maksimal karena sinyal akan kembali terkompres sebelum dilepas. Kombinasi antara attack dan release time sangatlah penting untuk menghasilkan karakter dinamika seperti yang diinginkan.

Gain
Gain disebut juga output, digunakan untuk mengkompensasikan gain yang tereduksi oleh proses kompresi. Misalnya kita mengkompres vokal dengan gain reduction sebesar 4 dB. Maka sinyal audio yang dihasilkan akan terdengar lebih lemah 4 dB dibanding sinyal audio sebelum dikompres. Untuk mengembalikan gainnya seperti sediakala, maka kita menaikan gain atau output sebesar 4 dB.

Bagaimana Menyetting Compressor?
Setelah mengetahui gambaran umum tentang fungsi masing-masing knob yang ada pada compressor, maka tahap selanjutnya adalah mencoba mempraktekkan teori yang telah didapat ke dalam aplikasi nyata. Namun dengan banyaknya knob yang ada, kadang membuat kita bingung darimana kita harus mulai menyetting compressor dan bagaimana.

Nantikan Understanding Compressor part 2 dimana saya akan mencoba mengupas satu teknik yang hopefully dapat membantu mempercepat learning curve kamu dalam memahami compressor

Mixing Tutorial | Distorsi | Studio Rekaman | Home Recording | Jual Midi Controller | Jual Alat Rekaman


View the Original article

Understanding Compressor (Part 2) - Bagaimana Menyetting Compressor

Belajar bagaimana menyetting compressor dengan benar tentu bukan hal yang mudah karena efek yang dihasilkan compressor tidak terlalu audible seperti misalnya equalizer, reverb, delay, dan tools pemanipulasi suara lainnya. Salah satu pendekatan menyetting compressor yang cukup ampuh untuk memahami bagaimana compressor bekerja dan bagaimana output yang dihasilkan adalah menyetting compressor secara ekstrim sehingga kita dengan jelas mendengar apa yang kita


Langkah Pertama
Set release secepat mungkin, ratio setinggi mungkin, dan thresold hingga sinyal terasa sangat terkompres. Setelah kita mendapatkan tiga knob tersebut pada posisi yang sangat ekstrim, sekarang saatnya mengatur knob attack ke posisi yang diinginkan. Dengan setting yang ekstrim akan mempermudah kita untuk mengetahui perubahan suara yang terjadi ketika kita mengatur attack.

Selanjutnya sweep attack dari sangat cepat ke sangat lambat sambil mendengar dengan cermat perubahan suara yang terjadi. Attack yang cepat akan memotong transien sehingga suara terdengar tumpul dan attack yang lambat akan meloloskan transien. Bagaimana kamu akan menyetting attack akan sangat tergantung pada situasi dan sound yang ingin kamu dapatkan.

Yang menjadi poin penting adalah lupakan presets. Dengan banyak mendengar kamu akan semakin mendapatkan “feel” untuk mendapatkan sound yang diinginkan dengan cepat. Namun preset juga dapat menjadi starting point yang memberi kita masukan bagaimana kita menyetting compressor pada situasi tertentu, hanya saja jangan terlalu tergantung pada presets sehingga melupakan esensi penting dari mixing itu sendiri.

Poin penting lainnya adalah dengan setting yang ekstrim pada tiga knob tersebut, sound yang terdengar akan sangat parah, kamu harus mengabaikan hal itu. Setting yang ekstrim dimaksudkan agar kamu fokus pada efek dari perubahan attack time.


Langkah kedua
Setelah attack time berada pada posisi yang diinginkan, saatnya melangkah ke setting release. Sama seperti menyetting attack, dengarkan perubahan suara yang terjadi dengan cermat, lupakan perhitungan matematika (seperti mengenai berapa “seharusnya” release time sesuai dengan BPM dengan rumus tertentu or whatever) dan rasakan feel/groove nya.


Langkah ketiga
Setelah mendapatkan attack dan release, sekarang saatnya menurunkan ratio ke posisi yang kamu inginkan. Salah satu pendekatan yang bisa dilakukan adalah turunkan ratio hingga kamu tidak lagi mendengar efek dari attack dan release kemudian naikan lagi sedikit hingga sound yang dihasilkan terdengar pas. Kuncinya tetap sama, dengarkan dengan cermat.


Langkah keempat
Setelah mendapatkan attack, release, dan ratio, persiapkan dirimu pada langkah terakhir yaitu thresold. Jika kamu mengikuti tutorial ini dari awal dengan baik, kemungkinan compressormu sedang bekerja setiap saat denga keras karena gain reduction yang tinggi sehingga kamu dapat mendengar dengan jelas perubahan suara yang terjadi karena setting tiga knob pertama tapi mungkin hal ini bukanlah yang kamu inginkan

Naikan thresold perlahan atau turunkan thresold perlahan sehingga sound yang dihasilkan terdengar pas, tidak over compressed tapi tidak juga kurang terkompres (depends on your wants and tastes).


Penutup
Saya berharap proses kecil ini dapat membantu “membuka” telinga kamu sehingga kamu dapat mendengar perubahan suara yang terjadi pada tiap knob dalam compressor denga jelas sehingga kamu mempunyai pegangan dalam memutuskan bagaimana kamu harus menyetting compressor untuk mendapatkan sound yang kamu inginkan. Mixing itu tentang bagaimana mendengarkan dengan cermat dan menurut saya proses ini dapat membantu mempermudah untuk mendengar dengan cermat efek yang dihasilkan dari proses compression.

Focusrite | Rode Microphone | Mixing Tutorial | Studio Rekaman  | Home Recording


View the Original article

Wednesday, April 25, 2012

Tutorial Audition 3 : Membuat Lagu Karaoke


Anda minat berkaraoke?..Aku tahu diluar sana terdapat ramai orang yang amat meminati bidang nyanyian ini termasukla aku .Tapi hanya sekadar suka-suka untuk menghilangkan tension.Dulu selalu jugak pegi Alam Sentral berkaraoke dalam Jamban satu lagu Rm1.00 kalau 10 lagu Rm10.00.Banyak jugak kan kalau Rm10.00 tu beli makanan tentu dah kenyang.

Jadi pada kali ini aku nak tunjukkan kepada anda semua tutorial cara untuk membuat lagu karaoke dengan meenggunakan Adobe Audition 3.0.Software Adobe Audition 3.0 ini digunakan untuk menghilangkan suara asal dari dalam lagu mp3 dan boleh dijadikan lagu untuk karaoke.jadi bolehlah anda berkaraoke secara percuma dihadapan Pc anda selepas ini.Anda boleh ikuti Video tutorial dibawah ini jika berminat untuk cuba membuatnya dan untuk dapatkan software ini anda boleh downloadnya dibawah.


Check Grasak Fuck Audio Production : Download Songs

Lihat tutorial lain tentang Recording


LinkWithin

Related Posts Plugin for WordPress, Blogger...
Klik di sini untuk melihat:


Entri Populer

Grasak Fuck Audio Production

Followers

Search Engine

Loading
x

join to my fans at facebook